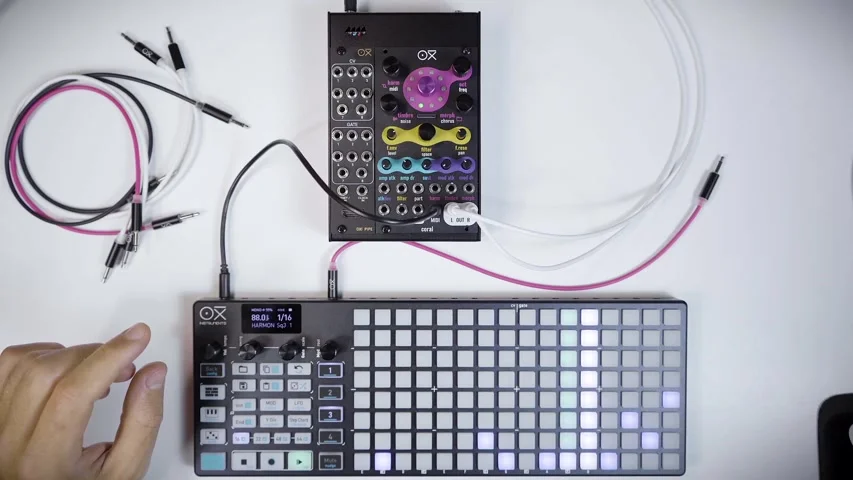
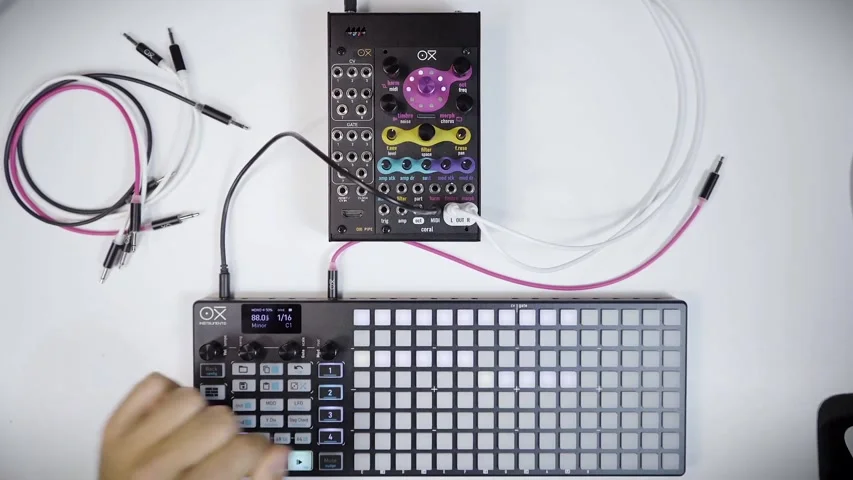
Welcome to EP.5 of the OXI Coral guide series. This time, I'll be covering voice setup and multitimbrality.
By assigning different MIDI channels to Coral's 8 voices, you can treat each one as an independent part. In the video we're referencing this time, an OXI Instruments team member plays Coral live, starting from a chord pattern and progressively layering in bass, drums, and a lead melody to build up a multitimbral jam-performance setup. In this article, I'll follow along with the flow of the video and walk through how to assign MIDI channels to each voice, how to design sounds at the part level, how to route CV modulation, and how to save and load settings to and from the SD card.
Takazudo Modular publishes manuals and related documents with Japanese translations. See the links below.
- The Multi-Part Concept
- Selecting Voices and Creating Parts
- Dialing In the Bass Sound
- Adding the Drum Part
- CC Modulation via MIDI
- Adding the Lead Melody
- Assigning CV Modulation
- Saving to and Loading from the SD Card
- Tips
The Multi-Part Concept
On Coral, voices that share the same MIDI channel are grouped together as a single part. By default, all 8 voices are assigned to MIDI channel 1, so there's only one part.
When you change a voice to a different MIDI channel, a new part is automatically created. For example, if you change Voice 1 to MIDI channel 2, you end up with two parts: "Voice 1 on channel 2" and "Voices 2-8 on channel 1." Each part can have its own engine settings, envelope, and effects amounts, so a single unit can handle multiple tones like bass, chords, drums, and lead simultaneously.
The video's demonstration begins with all 8 voices assigned to MIDI channel 1 (the default state), playing a chord pattern. The chords are received on MIDI channel 1 and sound polyphonically across all 8 voices. From there, MIDI channels are gradually assigned to individual voices, adding new parts one by one.
Selecting Voices and Creating Parts
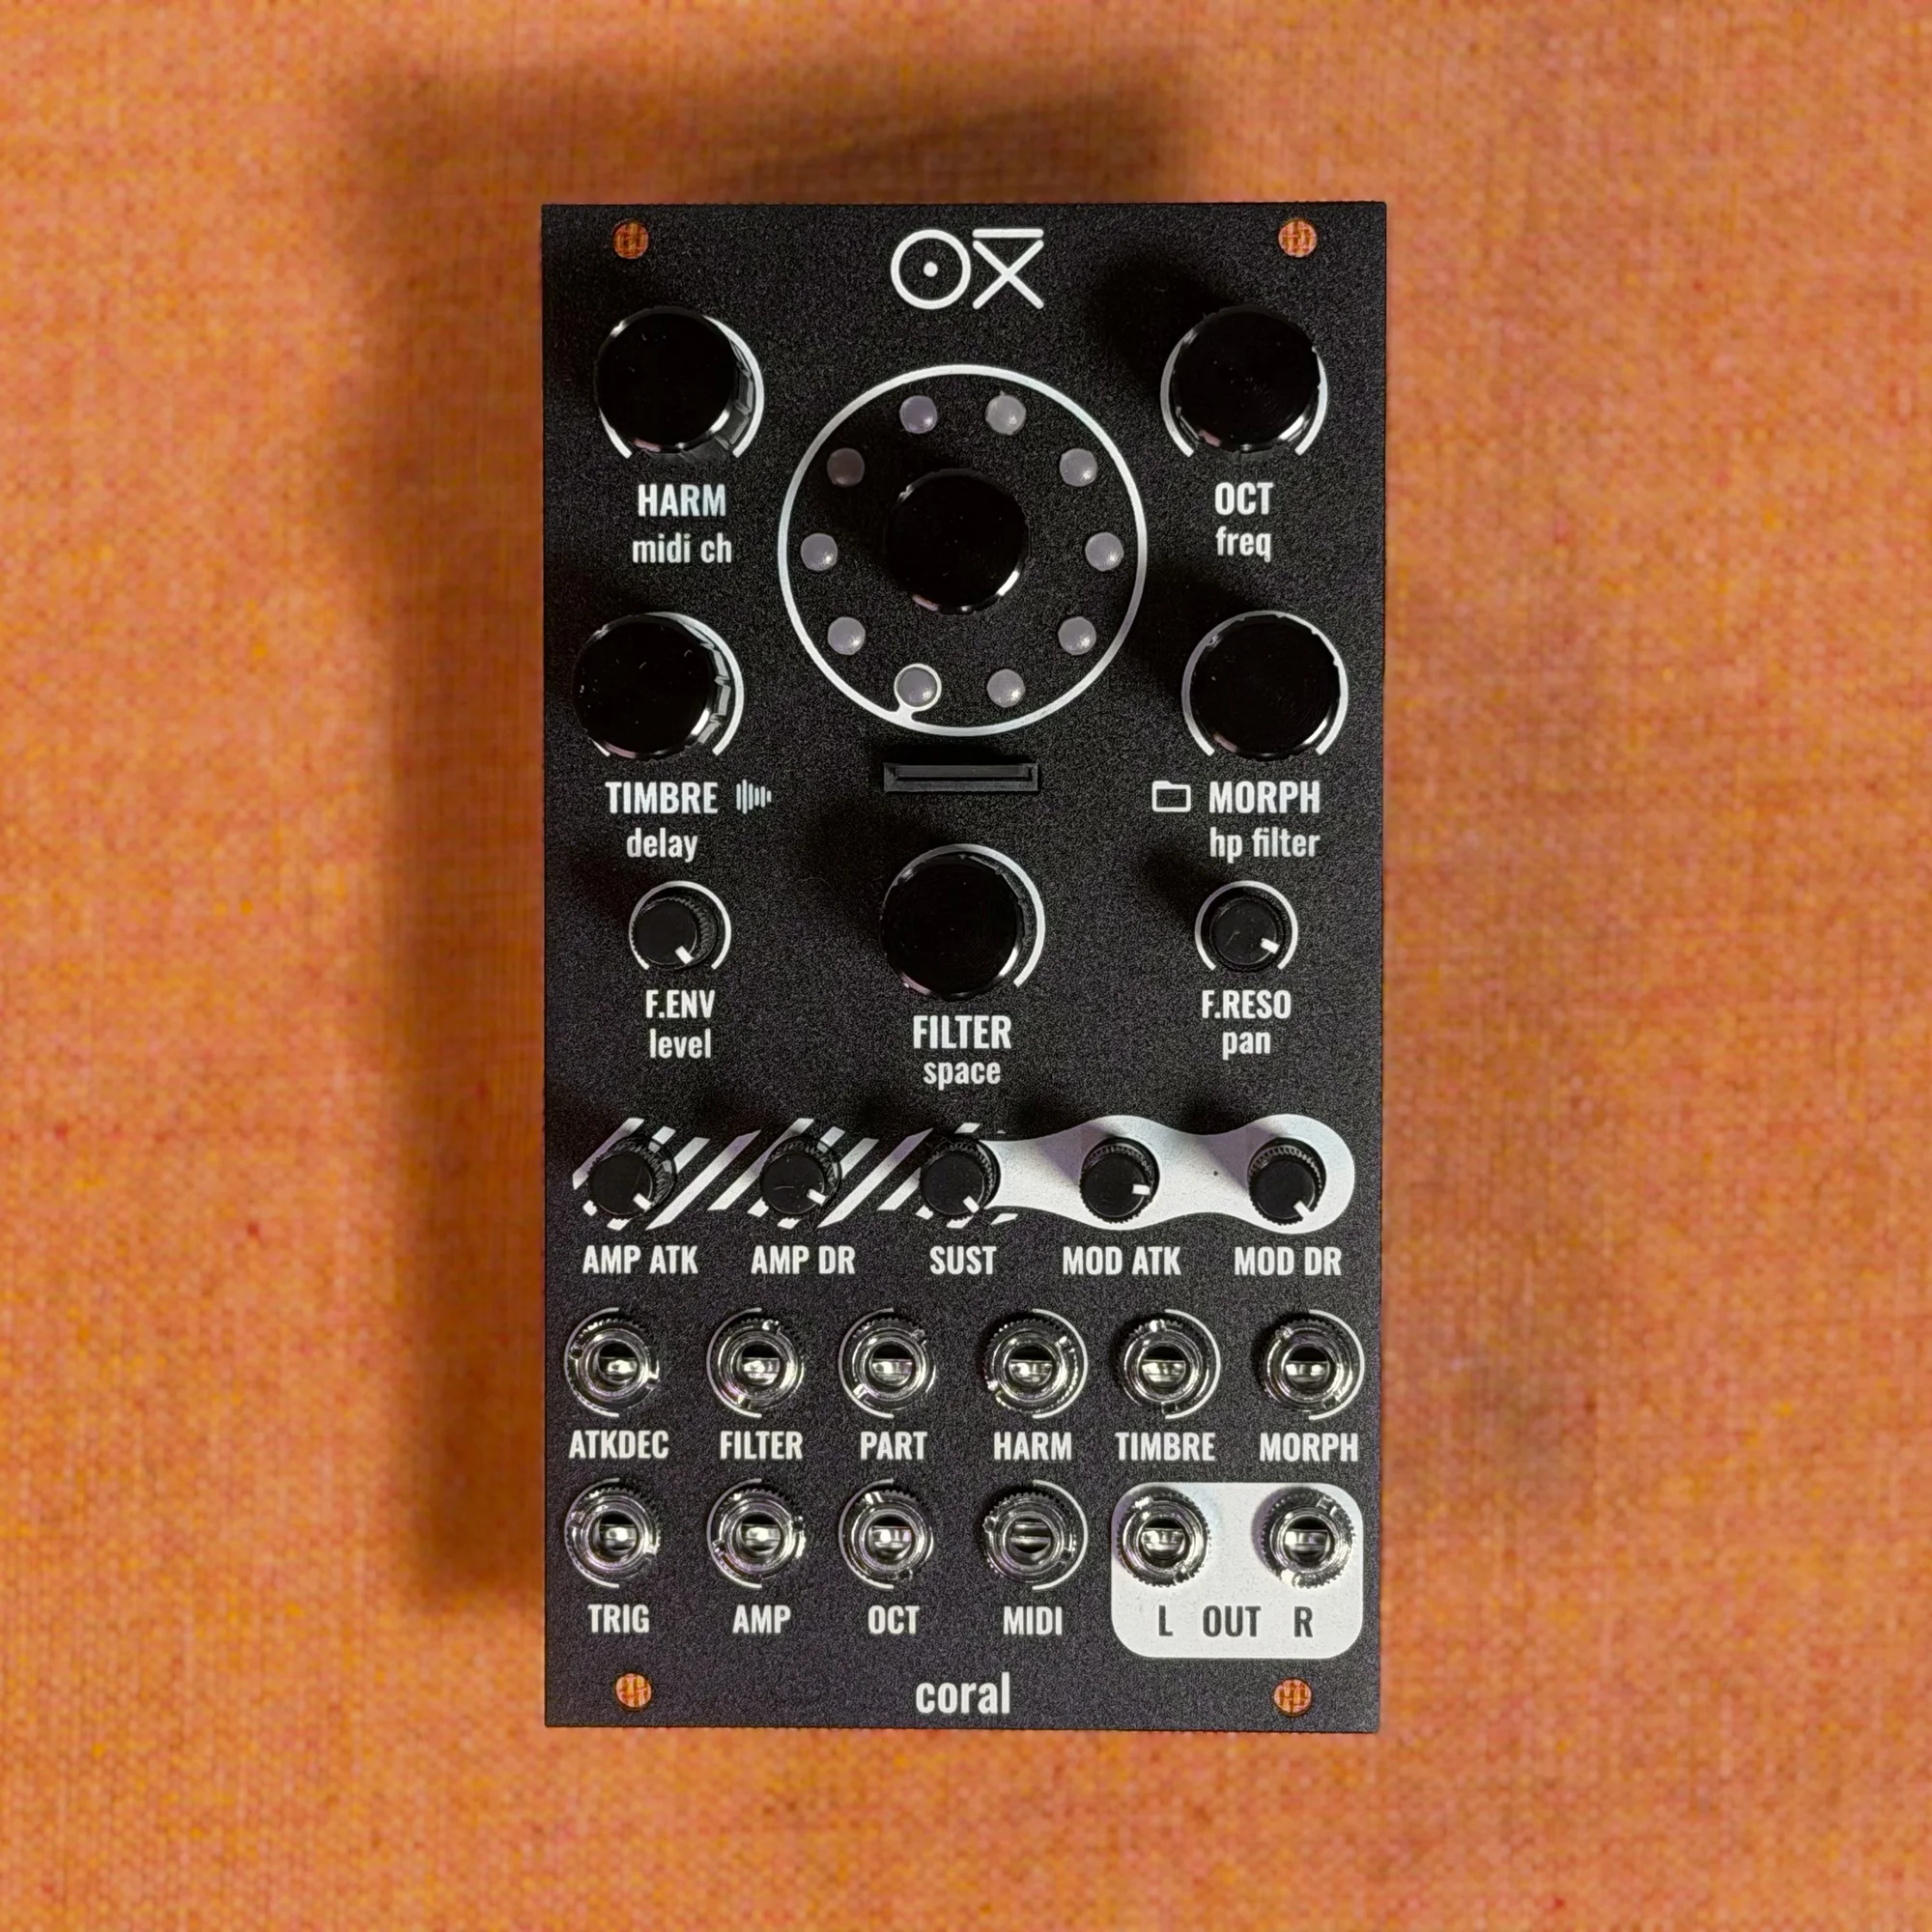
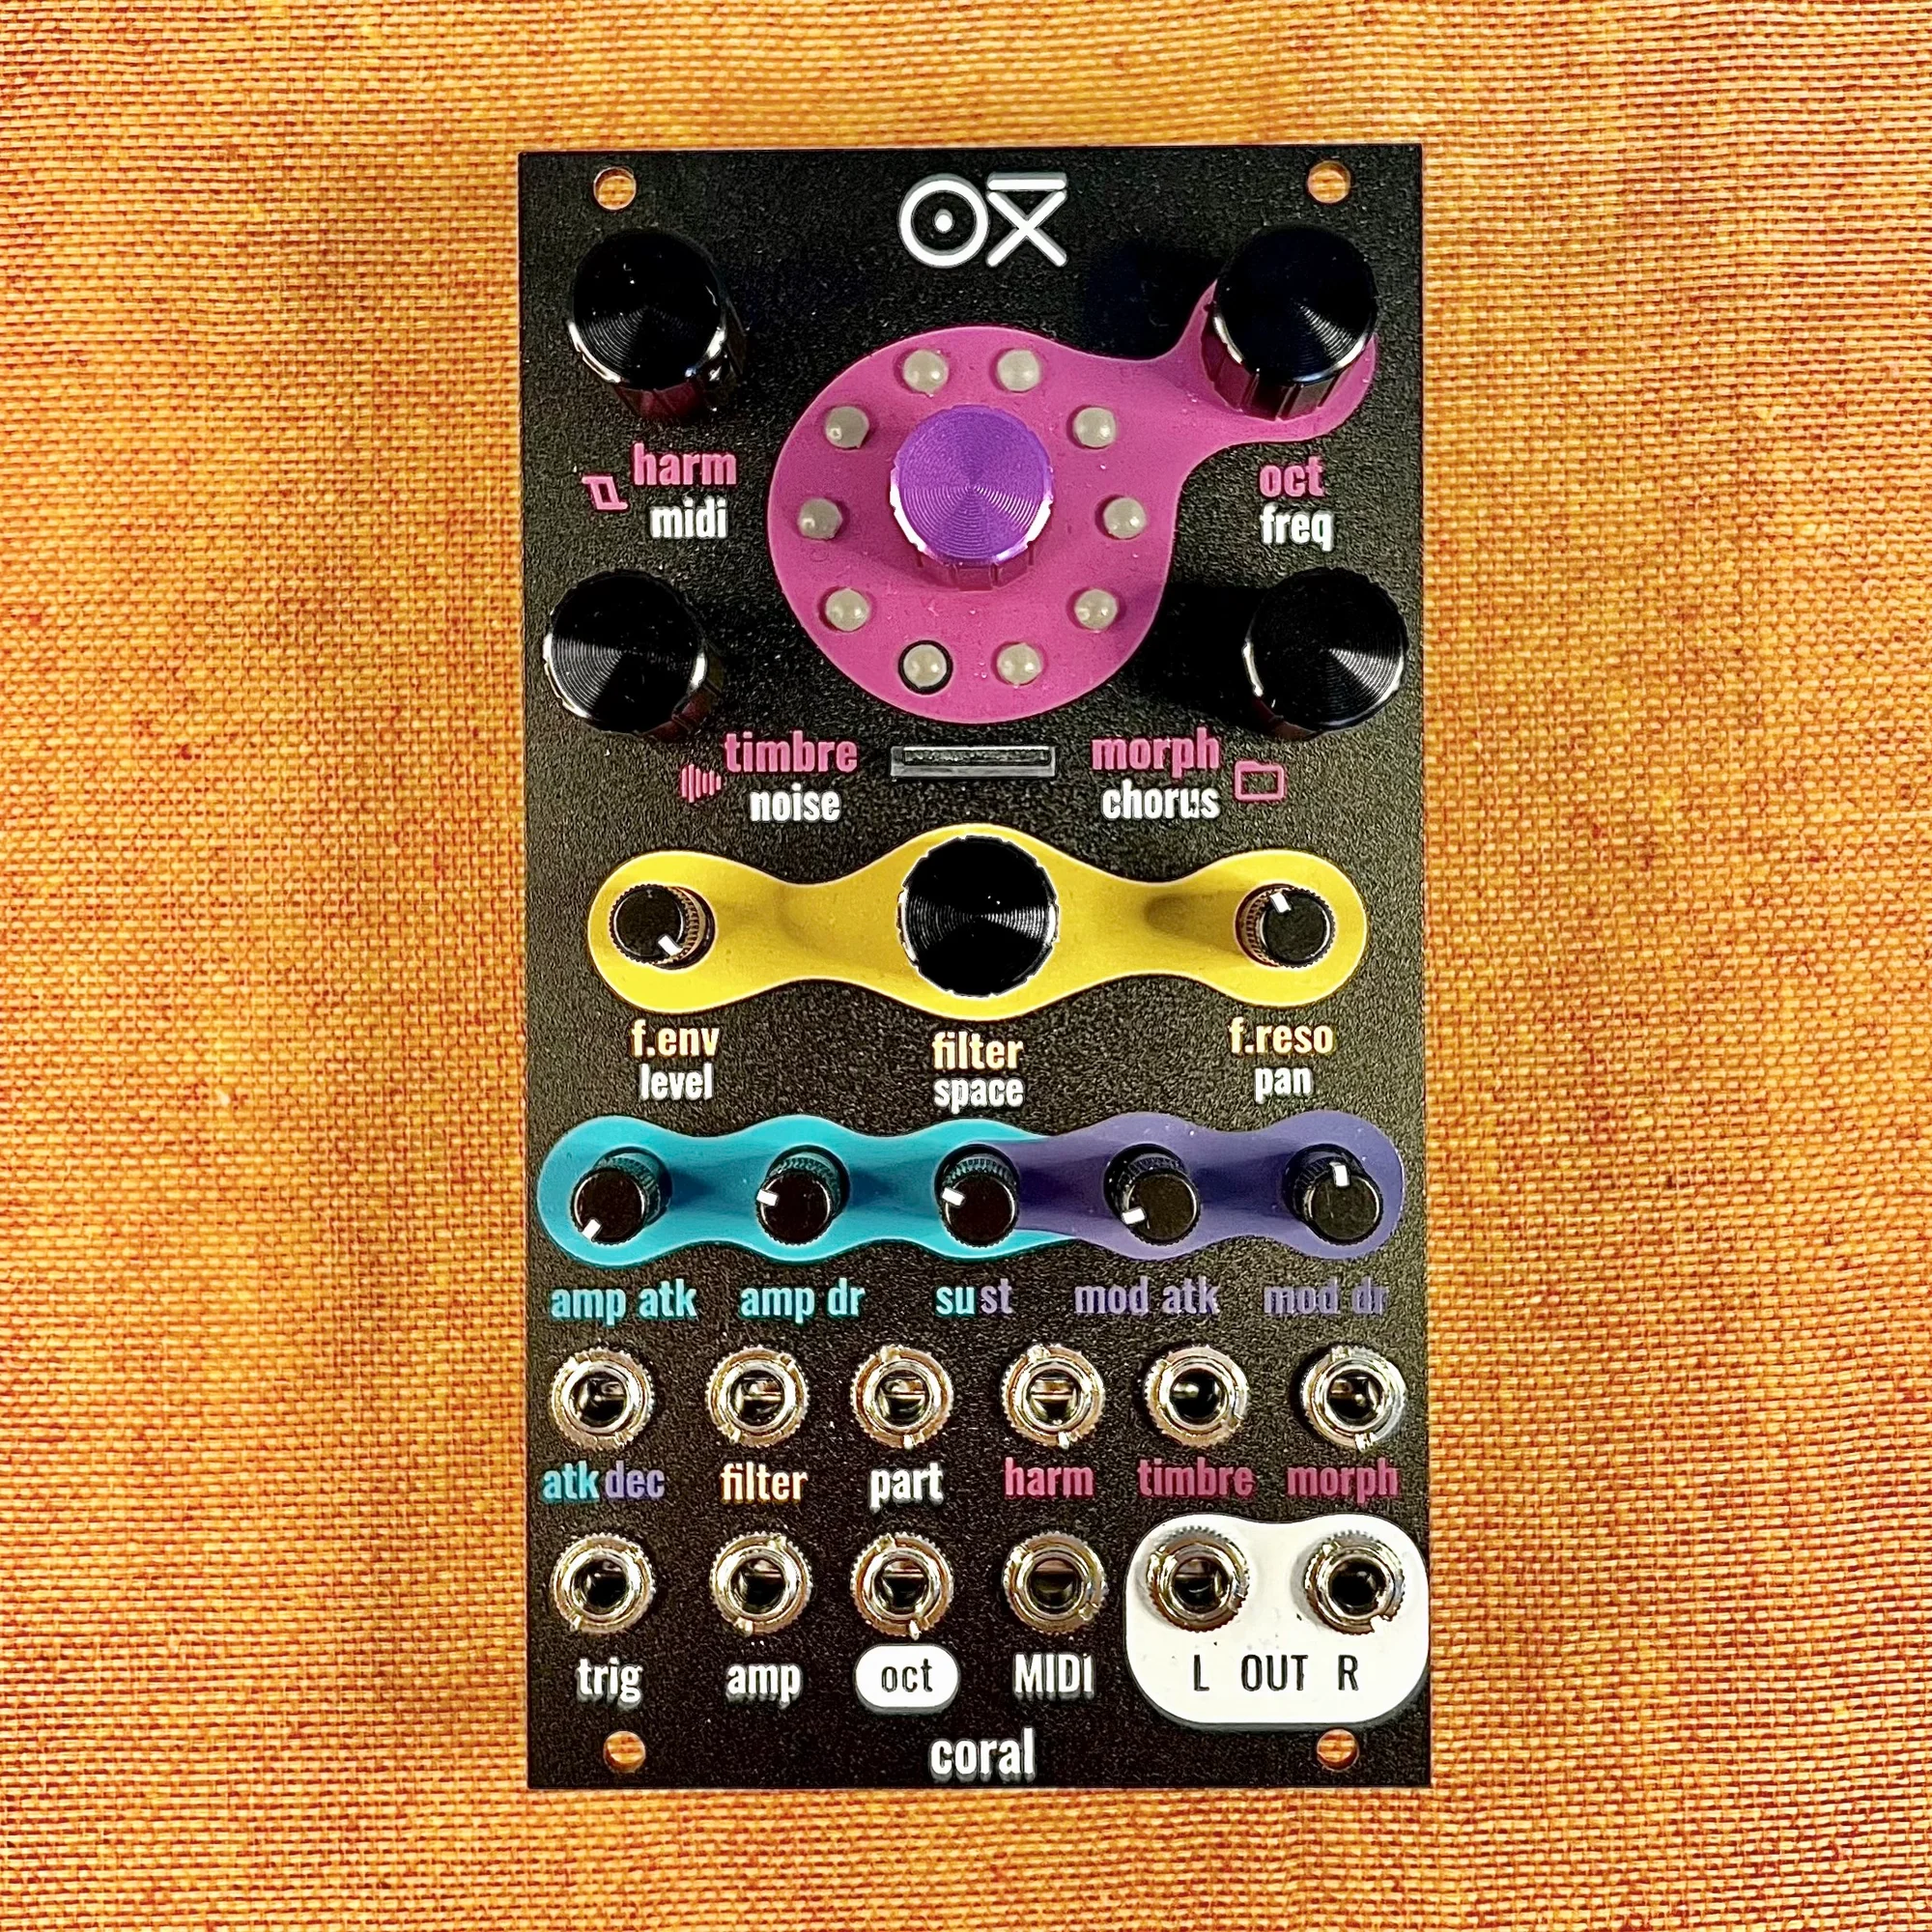
Selecting a Voice
Press and hold the encoder while turning it to cycle through voice selections. The LED ring display indicates the current voice selection state.
Here's what the colors mean:
Bluish (turquoise): An individual voice is selected
Greenish turquoise: An entire part is selected
All LEDs lit: All voices are selected (default state)
Changing the MIDI Channel
While the voice is still selected (encoder held down), turn the harm/midi knob to change the MIDI channel. This knob controls harm as the primary parameter and MIDI channel as the secondary parameter. Holding the encoder down switches it into the secondary MIDI channel mode.
Once you've turned the knob to the desired MIDI channel, release the encoder. Voice 1 is now assigned to the new MIDI channel, and a new part has been created.
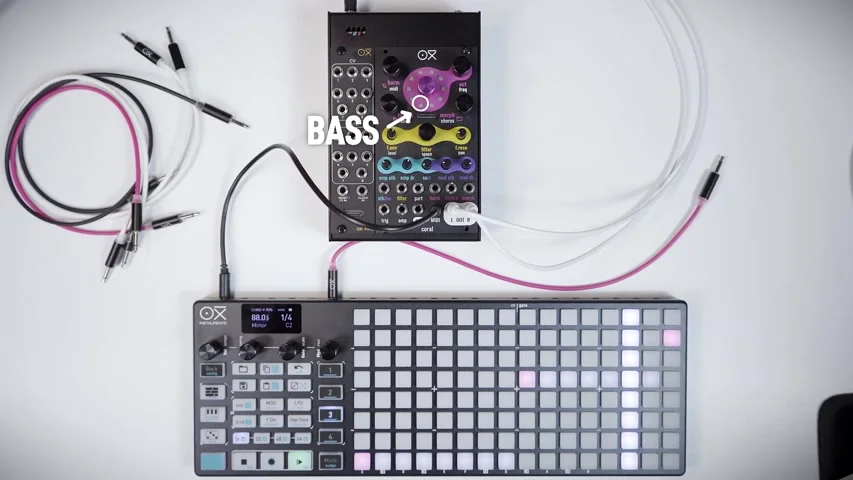
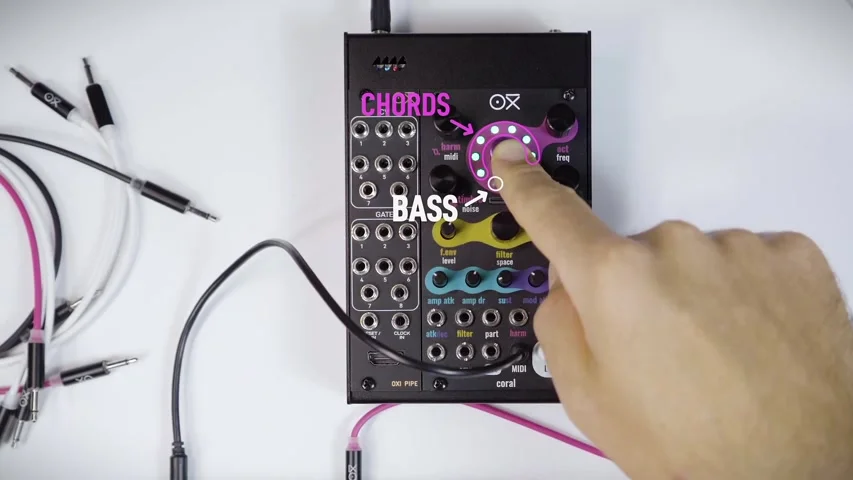
Creating the Bass Part
In the video, Voice 1 is selected and set to MIDI channel 2 in order to add a bass line. This creates the following two parts:
Part 1: Voices 2-8 (for chords, MIDI channel 1)
Part 2: Voice 1 (for bass, MIDI channel 2)
Press and hold the encoder while turning it, and you'll cycle through all-voices selection → part selection → individual voice selection. In part-selection mode, the LEDs light up in a greenish turquoise to show which voices belong to that part.
Dialing In the Bass Sound
With the bass part (Voice 1) selected, you adjust the engine and parameters to shape a proper bass tone. By default it uses the same settings as the chord part, so in the video the following changes are made:
Remove reverb: Turn the space knob down to set the reverb send to 0
Open the filter: Raise the filter cutoff to brighten the sound
Shorten the attack: Use the amp atk knob to shorten the attack time for a more bass-like response
Change the engine: Turn the encoder to switch to a different engine
Each parameter's knob position may differ from its stored value, so you need to move the knob once to complete the "catch-up" before your changes take effect.
Adding the Drum Part
Next, the video adds a drum part. Three voices are dedicated to drums here:
Voice 8: Kick (MIDI channel 8)
Voice 7: Snare (MIDI channel 7)
Voice 6: Hi-hat (MIDI channel 6)
For each voice, press and hold the encoder while turning to select the voice, then use the harm/midi knob to assign a MIDI channel.
Kick Sound Settings
With Voice 8 (kick) selected, the video sets things up like this:
Turn the encoder to switch to the Kick Model engine
Set the space knob reverb to 0 (a kick is typically dry)
Raise the filter cutoff to the max
Adjust the octave with the oct knob
Fine-tune the pitch with the tune knob
Snare and Hi-Hat Settings
The snare (Voice 7) and hi-hat (Voice 6) are set up the same way.
Snare (Voice 7):
Switch to the Snare Synth engine
Use the harm knob to balance the harmonic and noise components
Use the mod dr knob to adjust the internal envelope decay
Hi-hat (Voice 6):
Switch to the Hi Hat Synth engine
Raise the filter cutoff to the max
Adjust the octave with the oct knob
For each of the drum engines (Kick Model, Snare Synth, Hi Hat Synth), the mod dr knob controls the decay of the internal envelope. This value has a big impact on the length and character of the drum sound, so it's worth tuning per engine.
CC Modulation via MIDI
Since each part is identified by its MIDI channel, you can send CC messages from an external sequencer to control parameters on each part independently. CC messages are filtered by MIDI channel and only affect the part on the matching channel.

In the video, CC automation is set up on the snare (channel 7), controlling the reverb send in real time. CCs are unipolar and override the knob's current value.
Adding the Lead Melody
Finally, the video adds a part for the lead melody. Voice 5 is set to MIDI channel 3.
Here's how the lead sound is dialed in on the video:
Turn the encoder to change the engine (2 OP FM, Waveshaping, etc.)
Use the space knob to add a moderate amount of reverb send
Add a chorus effect with the chorus knob to widen the sound
With this, you have the following 6 parts in place:
| Part | Voices | MIDI Channel |
|---|---|---|
| Chords | Voices 2-4 | Channel 1 |
| Bass | Voice 1 | Channel 2 |
| Lead | Voice 5 | Channel 3 |
| Hi-hat | Voice 6 | Channel 6 |
| Snare | Voice 7 | Channel 7 |
| Kick | Voice 8 | Channel 8 |
Assigning CV Modulation
To assign CV modulation to a specific part, use the CV Assign screen.
Here's how to get to the CV Assign screen:
From the main view (voice status), tap the encoder three times quickly
The display cycles through the Load/Save screen and then the CV Assign screen
Once you're on the CV Assign screen (purple), turn the encoder to select the part you want the CV modulation to affect
Tap once more to confirm
In the video, the lead (Voice 5, channel 3) is selected and CV Assign is confirmed, showing that the timbre parameter modulation from the CV input only affects the lead part.
Each set of three encoder taps cycles the screens in this order: main view → Load/Save → CV Assign. When a voltage is applied to the Part CV input, the CV Assign screen setting is overridden by the Part CV.
Saving to and Loading from the SD Card
You can save your multi-part setup to the SD card.
Saving
Tap the encoder twice to enter the Save screen
Turn the encoder to select a save slot
Tap once more to confirm
Loading
Tap the encoder once to enter the Load screen
Turn the encoder to select the slot to load
Tap to confirm
Tips
Start simple: Rather than trying to create many parts from the beginning, it's recommended to start with just 2 parts (e.g., chords + bass) to get used to the workflow before expanding
Manage parts by MIDI channel: Mapping parts 1-8 (MIDI channels 1-8) to tracks on your external sequencer gives you intuitive control
mod dr on drum engines: On the drum-specific engines (Kick Model, Snare Synth, Hi Hat Synth), the mod dr knob controls the decay of the internal envelope. Because this parameter has a major effect on sound length and character, it's one of the most important values to dial in first
Reset with Voice/Part Reset: To return all voices to MIDI channel 1, press and hold the encoder for 5 seconds or more to reset (a red LED animation will appear)
In the next EP.6, I'll cover more features of OXI Coral.
OXI Coral Product Details
See the OXI Coral product details below.
8-voice multitimbral polysynth module in 14HP. Combines synth, sampler, and drum functions with a low-pass filter, chorus and reverb effects, custom wavetables, and multiple firmware options.
8-voice multitimbral polysynth module in 14HP. Combines synth, sampler, and drum functions with a low-pass filter, chorus and reverb effects, custom wavetables, and multiple firmware options. Black edition.